If you’ve ever asked yourself “What season is best for gutter cleaning?”, you’re not alone. In Melbourne, Australia — where the weather can swing from bone-dry to drenched overnight — this question holds more weight than you might think. Gutter maintenance might not be glamorous, but it’s absolutely vital for safeguarding your home against water damage, structural issues, and even pest infestations.

In this article, we’ll delve into the ideal seasons for gutter cleaning in Melbourne, explore why timing matters, and offer professional insights to keep your roof drainage system working like clockwork. Whether you’re a new homeowner or a seasoned Melburnian looking to extend your property’s lifespan, this guide is your seasonal compass for smarter home upkeep.
🌦️ Melbourne’s Climate: Why Timing Matters for Gutter Cleaning
Melbourne is infamous for its “four seasons in one day” reputation. This dynamic climate — shaped by cool winters, hot summers, and unpredictable rainfall — makes timing your gutter cleaning not just a chore, but a strategy.
Key Melbourne Weather Patterns:
- Autumn (March to May): Heavy leaf fall from deciduous trees, especially in leafy suburbs like Kew, Camberwell, and Box Hill.
- Winter (June to August): Increased rainfall and moisture levels can clog already full gutters and downpipes.
- Spring (September to November): Budding plants and winds bring pollen, seeds, and organic debris.
- Summer (December to February): Drier, but with the threat of bushfire season — meaning clogged gutters can pose a serious fire hazard.
Understanding these patterns is essential to answering the core question: What season is best for gutter cleaning in Melbourne?
🍁 Autumn: The Prime Time for Gutter Cleaning
Autumn is hands down the best season for gutter cleaning in Melbourne. Why? Because this is when the majority of leaf litter from trees like liquidambars, oaks, and elms ends up in your gutters. And in suburbs like Ivanhoe or Canterbury, where mature trees line many properties, the accumulation can be swift and substantial.
Why Autumn is Optimal:
- Leaf fall is at its peak, especially during April and May.
- Cleaning now prevents blockages during winter rains.
- Removes fire hazards ahead of the summer dry season.
If you live near Yarra Bend Park or around the Dandenong Ranges, you’re particularly at risk of blocked gutters due to dense tree coverage. Scheduling a professional clean or doing a thorough DIY job in late autumn is your best hedge against future water damage.
❄️ Winter: Critical for Water Flow, But Not Ideal for Cleaning
Winter brings higher rainfall, particularly in areas like Belgrave or Healesville where rainfall totals are above average. If your gutters are already clogged from autumn’s debris, winter is when problems escalate.
Why Winter Isn’t Ideal:
- Working conditions are slippery and unsafe for DIYers.
- Gutter blockages can result in overflowing water, roof leaks, and even fascia board rot.
- Cold and wet conditions can compact debris, making it harder to remove.
Pro tip: If you missed the autumn clean, get a professional in during winter for an emergency clean — especially before major storms hit.
🌱 Spring: A Strong Second Option
Spring is the runner-up season for gutter cleaning in Melbourne. Winds pick up, flowers bloom, and pollen, twigs, and bird nests often find their way into your gutter system.
Why Spring Works:
- You’re preparing for bushfire season, where clean gutters are crucial.
- It’s a good follow-up clean after a heavy leaf-fall autumn.
- Mild temperatures and fewer rainy days make it safer and more comfortable for cleaning.
Especially in bush-prone suburbs like Warrandyte or Eltham, spring is a vital season to remove combustible material and comply with CFA bushfire safety guidelines.
☀️ Summer: Maintenance for Safety, Not a Primary Cleaning Season
Summer may seem like an easy season to get things done around the house, but when it comes to gutter cleaning in Melbourne, it’s not your go-to. However, if you’re in bushfire zones, clean gutters can prevent embers from igniting built-up dry debris.
Why Clean in Summer (If Necessary):
- Fire risk mitigation in high-risk zones (e.g., the Mornington Peninsula, the Yarra Valley).
- Drier conditions make cleaning easier, but the debris load is typically lower.
If you’ve already cleaned in autumn and spring, a quick summer check is typically enough — unless you’re in fire-prone areas where a full clean might be necessary.
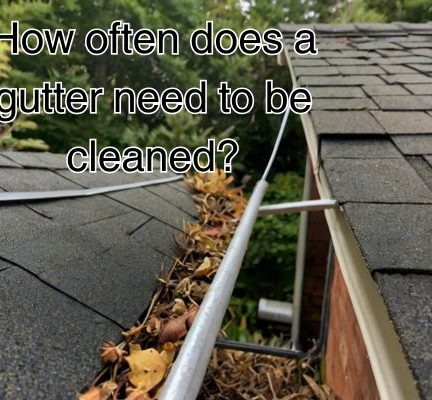
🧰 How Often Should You Clean Gutters in Melbourne?
For most Melbourne homeowners, twice per year is the sweet spot — once in late autumn and once in early spring. However, if your home is surrounded by tall trees or is located in a high-fire-risk zone, three to four times annually may be required.
Frequency Guidelines:
- Urban/Suburban homes (few trees): Twice annually
- Homes near bushland or with large trees: Three to four times
- High rainfall areas (e.g., The Basin, Ferny Creek): Monitor every season
🏠 Benefits of Seasonal Gutter Cleaning
Understanding the best season is only part of the picture — consistent cleaning offers real benefits for property longevity and safety.
Key Benefits:
- Prevents roof and water damage
- Deters pests like mosquitoes and rodents
- Reduces bushfire risks
- Boosts property value by maintaining fascia and exterior integrity
- Ensures your stormwater drainage is functioning effectively
🛠️ DIY vs Professional Gutter Cleaning in Melbourne
You might be tempted to do it yourself, but in Melbourne, especially in homes with double-storey structures or steep rooflines, professional gutter cleaning services are often the safer and more thorough option.
Local Gutter Cleaning Services in Melbourne:
- Gutter-Vac Melbourne East
- Grayson’s Gutter Cleaning
- Jim’s Mowing (Gutter Cleaning division)
- Gutter Cleaning Melbourne
These companies typically offer extras like roof inspections, minor repairs, and gutter guard installations — making your seasonal clean even more worthwhile.
🧭 Final Thoughts: Time It Right, Protect Your Home
So, what season is best for gutter cleaning in Melbourne? The answer is autumn, with a strong case for spring as a backup or follow-up. Cleaning your gutters seasonally is not just smart — it’s essential for preserving your home’s health, especially in a climate as erratic as Melbourne’s.
By integrating gutter cleaning into your home maintenance calendar, particularly in high-risk or tree-dense suburbs like Doncaster, Glen Waverley, or Montmorency, you not only dodge costly repairs but also create a safer, cleaner environment for your household.