Modern Slat Wall Design are an innovative and modern method to improve the aesthetics of your room by adding warmth, texture, and better acoustic performance. It doesn’t matter if you’re remodeling a business space or sprucing up the inside of a trendy house; these panels will provide a touch of contemporary elegance with very little effort. You will be able to obtain a sleek and professional appearance on your own with the help of this tutorial, which breaks down the installation process step by step.
Why Choose Wood Slat Wall Panels?
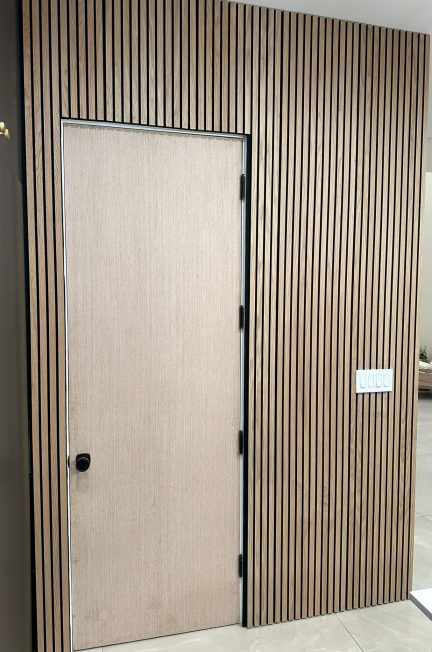
Wood slat wall panels offer the perfect balance of form and function. Their sleek, vertical lines create architectural interest, while their sound-dampening qualities improve acoustics. These panels are available in a wide range of finishes, ranging from light oak to deep walnut, and they are able to blend in perfectly with contemporary, rustic, or industrial aesthetics.
If you are in Southern California, particularly in El Segundo, you can discover impressive options at Slat Wood Panel Wall El Segundo, where premium materials and expert recommendations for your next wall upgrade are available.
Preparing for Installation
Gather the Right Tools
Before you begin, ensure you have the essentials:
- Wood slat wall panels
- Measuring tape and pencil
- Level
- Construction adhesive
- Power drill with black screws
- Safety glasses
- Saw (jig, miter, or table)
- Stud finder (optional but helpful)
Measure & Map Out
Start by measuring your wall and creating a layout for any outlets, switches, or trim you may require. To ensure that your initial panel is absolutely straight, you should use a level to mark the guidelines. This foundation will guide the entire project.
Find Your Studs
Try to find and mark the wall studs if at all feasible. By screwing panels into studs, you may increase the longevity of your installation and prevent panels from moving over time thanks to this method.
Installing the Panels
Step 1: Trim Panels as Needed
To cut panels to the appropriate dimensions, you should make use of a saw, particularly when you are moving around fixtures or altering the layout. It is possible to achieve cleaner results by cutting before applying glue.
Step 2: Apply Adhesive
The back of each panel should have a substantial amount of construction adhesive applied to it in a zigzag or “S” pattern for the best results. This method not only provides rapid grip, but it also reduces the number of fasteners that are required.
Step 3: Mount and Screw
The panel should be securely placed on the wall in accordance with your guideline. The panel should be pressed into position, and then black screws should be drilled through it and into studs (or wall anchors, if further security is required). To get a polished appearance, screws should be uniform.
Step 4: Repeat and Align
Carry on with the procedure, inspecting each panel individually for alignment and seams that aren’t too tight. Utilize your level on a consistent basis to keep the wall’s finish immaculate throughout its whole.
Final Touches for a Professional Look
After the installation is complete, use wood filler to fill in any screw holes, and if required, touch up the area with a stain or paint that matches the color. A gentle cloth should be used to wipe off each panel to eliminate any adhesive residue or dust. What comes out of it? A magnificent feature wall that is three-dimensional and has the appearance of being constructed to order.
Caring for Your Panels
- Dust panels regularly with a dry microfiber cloth
- Avoid harsh cleaners or water to prevent warping
- Periodically tighten any loose screws for longevity
Take Your Design Further
In addition to their decorative capabilities, wood slat panels can define and alter areas by striking the ideal balance between beauty and functionality. Whether you are renovating your house, constructing a contemporary workplace, or enhancing the atmosphere of a retail space, these panels offer both aesthetic appeal and functional benefits. When it comes to adding depth, warmth, and structure in any interior environment, they are an excellent choice because of their clear lines, natural textures, and acoustic qualities. Want to make your interior project shine online? Worldigital provides digital marketing services tailored for designers, contractors, and businesses in the home improvement industry.
